
danfoss radiator thermostat user guide
Danfoss Radiator Thermostat User Guide: A Comprehensive Overview (Updated 11/21/2025)
Today’s date is November 21, 2025. This comprehensive guide details Danfoss thermostats, covering installation, operation, troubleshooting, and advanced features for optimal heating control.
Danfoss, a nearly century-old leader, provides energy-efficient solutions for buildings, agriculture, and renewable energy, offering both components and total solutions.
This manual assists with replacing old thermostats, adjusting flow rates, and utilizing the Danfoss Eco app, ensuring comfort and sustainability within your home environment.
Welcome to the world of Danfoss radiator thermostats! For nearly a century, Danfoss has stood as a global frontrunner in delivering innovative and energy-efficient heating solutions. These thermostats represent a commitment to both comfort and sustainability within your home or building.
Danfoss thermostats aren’t simply about regulating temperature; they’re about intelligent climate control. They offer precise adjustments, allowing you to tailor heating to individual room needs, minimizing energy waste and maximizing savings. Whether you’re dealing with a mechanical, electronic, or smart (Danfoss Eco) model, understanding the core principles of operation is key to unlocking their full potential.

This guide will serve as your comprehensive resource, walking you through everything from initial installation and daily operation to troubleshooting common issues and exploring advanced features. Danfoss provides both components and complete solutions, ensuring a seamless integration into your existing heating system. Prepare to experience a new level of control and efficiency with your Danfoss thermostat!

Understanding the Benefits of Danfoss Thermostats
Danfoss thermostats offer a multitude of advantages beyond simple temperature regulation. Primarily, they contribute significantly to energy efficiency, reducing heating costs and minimizing your environmental footprint – a core value for Danfoss as a leader in sustainable solutions for nearly a century.
Precise temperature control allows for customized comfort in each room, eliminating wasted energy heating unoccupied spaces. Features like frost protection safeguard your pipes during cold weather, preventing costly damage. Modern Danfoss Eco smart thermostats further enhance these benefits with remote control via a dedicated app and integration with smart home systems.
Furthermore, Danfoss thermostats are known for their durability and reliability. Easy installation and maintenance contribute to long-term cost savings. By choosing Danfoss, you’re investing in a system designed for optimal performance, comfort, and a more sustainable future, backed by a company renowned for quality and innovation.
Danfoss as a Leader in Energy Efficiency
For nearly a century, Danfoss has been at the forefront of energy efficiency innovation. As a global leader and major original equipment manufacturer, the company doesn’t just offer components; it delivers comprehensive solutions for heating, cooling, and beyond, impacting industries from agriculture to renewable energy.
Danfoss’s commitment extends beyond individual products like radiator thermostats. They focus on improving comfort and sustainability in buildings, recognizing the significant energy consumption associated with heating systems. Their expertise encompasses drives, hydraulics, and inverters, all designed to optimize energy use.

This dedication is reflected in the design of their thermostats, prioritizing precise control and minimizing waste. Danfoss continually invests in research and development, striving to create technologies that reduce environmental impact and lower energy bills for consumers worldwide, solidifying their position as a true industry pioneer.

Types of Danfoss Radiator Thermostats
Danfoss offers a diverse range of radiator thermostats, including mechanical, electronic, and smart (Danfoss Eco) models, catering to various heating system needs and preferences.
Mechanical Danfoss Thermostats
Mechanical Danfoss thermostats represent a traditional, reliable approach to radiator temperature control. These thermostats operate using a wax-filled element that expands and contracts with temperature changes, directly influencing the valve opening. They require no batteries or electricity, making them a simple and cost-effective solution.
Adjustment is typically achieved through a numbered dial, allowing users to select a desired heat level. While lacking the advanced features of electronic or smart models, mechanical thermostats offer consistent performance and durability. Replacing an old Danfoss thermostat head is a common task, and these models are generally straightforward to install.
However, they don’t offer the precision or programmability found in more modern options. If a mechanical thermostat head becomes stuck or difficult to turn, it may indicate a need for replacement of the thermostat insert (Ventileinsatz). These thermostats are a solid choice for those seeking a basic, dependable heating control system.
Electronic Danfoss Thermostats
Electronic Danfoss thermostats offer enhanced precision and control compared to their mechanical counterparts. Utilizing digital sensors and microprocessors, these thermostats provide more accurate temperature regulation and often include features like digital displays and programmable schedules. They typically require batteries for operation, and regular battery replacement is necessary to maintain functionality.
These models allow for finer temperature adjustments and can be particularly beneficial for optimizing energy efficiency. While generally reliable, electronic thermostats can sometimes experience issues where they aren’t responding to adjustments, potentially requiring troubleshooting or component replacement.
Compared to mechanical versions, electronic thermostats offer greater flexibility and convenience. They represent a step up in technology, providing a balance between affordability and advanced features. Understanding the specific model’s functions is key to maximizing its benefits, ensuring comfortable and efficient heating throughout your home.
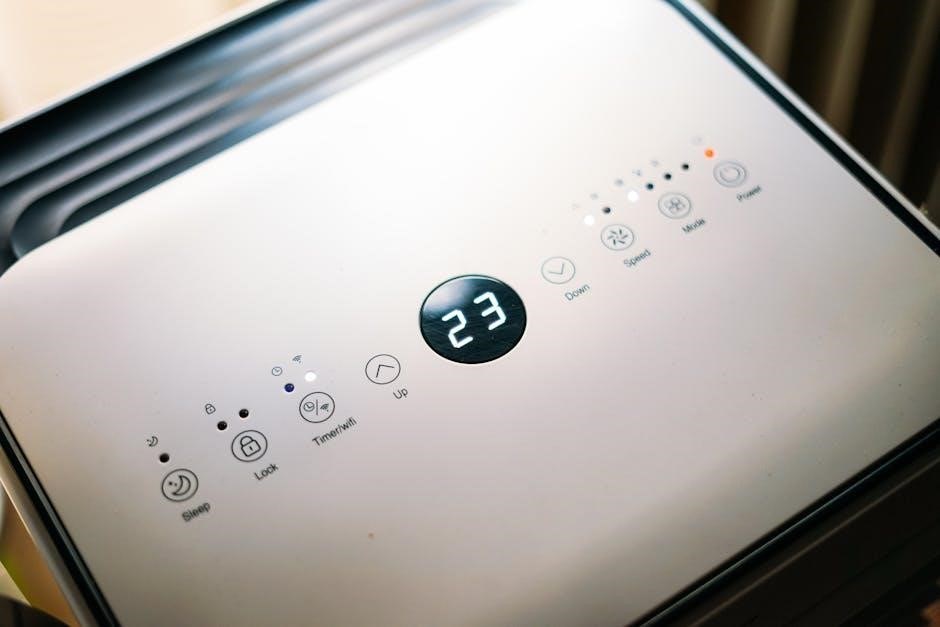
Smart Danfoss Thermostats (Danfoss Eco)
Danfoss Eco smart thermostats represent the pinnacle of heating control technology. These devices connect to your home’s Wi-Fi network, enabling remote control and monitoring via the Danfoss Eco app. This allows you to adjust temperatures from anywhere, optimizing comfort and reducing energy consumption.
Integration with smart home systems like Apple HomeKit, Amazon Alexa, and Google Assistant is a key feature, providing voice control and automated heating schedules. The app offers detailed energy usage reports, helping you identify areas for savings.
Smart thermostats learn your heating patterns and automatically adjust temperatures to maximize efficiency. They offer advanced features like geofencing, which adjusts the heating based on your location. While offering significant benefits, these thermostats require a stable Wi-Fi connection and occasional software updates to function optimally.

Installation Guide
Proper installation ensures optimal performance. This section guides you through preparing for installation, removing old thermostat heads, attaching the Danfoss head, and verifying a secure fit.
Follow these steps carefully for efficient heating and energy savings within your home environment.
Preparing for Installation
Before beginning the installation process, several crucial preparatory steps must be completed to ensure a smooth and successful outcome. First, gather all necessary tools, including a suitable wrench or pliers for removing the old thermostat head, and ensure you have the correct Danfoss thermostat head for your radiator valve type.
It’s vital to turn off the heating system before commencing any work on the radiator valves to avoid burns from hot water. Carefully inspect the existing valve to determine its compatibility with the Danfoss thermostat. If you are unsure, consult a qualified heating engineer.
Protect the surrounding area with a drop cloth to prevent damage from any potential water leakage. Familiarize yourself with the different parts of the Danfoss thermostat head and the valve insert (Ventileinsatz) to understand how they connect. Having a clear understanding of the components will simplify the installation process and minimize potential issues.
Finally, ensure you have read and understood the complete user guide before proceeding, paying particular attention to safety warnings and instructions.
Removing an Old Thermostat Head
Carefully removing the old thermostat head is a critical first step. Begin by locating the thermostat head on your radiator valve. Depending on the model, it may simply pull off, or it might require a slight twisting motion. If the head is stuck, avoid excessive force, as this could damage the valve itself.
Gentle persuasion is key. You might try using a soft cloth or rubber grip to improve your hold. If it remains stubbornly fixed, consult online forums or a heating professional for advice – forcing it could lead to costly repairs.
Once loosened, carefully pull the head straight off the valve body. Inspect the valve stem for any signs of corrosion or damage. If corrosion is present, clean it gently with a wire brush before proceeding. Be mindful of any residual water that may leak out, and have a cloth ready to absorb it.
Remember to retain the old head for potential future use or reference.
Attaching the Danfoss Thermostat Head
With the old thermostat head removed, you’re ready to attach the new Danfoss head. Ensure the valve stem is clean and dry before proceeding. Align the Danfoss thermostat head with the valve body, noting the correct orientation – usually, there’s a specific way it fits to ensure proper operation.
Gently push the head onto the valve stem. You should feel a firm click or resistance when it’s securely in place. Avoid forcing it; if it doesn’t seat easily, double-check the alignment. A proper fit is crucial for accurate temperature control and preventing leaks.
Once attached, give the head a gentle tug to confirm it’s securely fastened. Rotate the head slightly to test its movement and ensure it operates smoothly. If the head feels loose or wobbly, remove it and re-seat it, verifying the alignment once more.
A secure attachment is vital for efficient heating and preventing energy waste.
Checking for Proper Fit and Seal
After attaching the Danfoss thermostat head, a thorough check for a proper fit and seal is essential. Visually inspect the connection point between the head and the valve body, looking for any gaps or misalignment. A tight, flush connection is ideal.
Slowly turn on the heating system and carefully observe the area around the thermostat head for any signs of water leakage. Even a small drip indicates a compromised seal, requiring immediate attention. Address leaks promptly to prevent water damage and maintain heating efficiency.
Rotate the thermostat head through its full range of motion, from the frost protection setting to the maximum heat setting. Ensure smooth, consistent movement without any binding or resistance. Difficult rotation suggests an improper fit or internal obstruction;
A secure fit and leak-proof seal are paramount for optimal performance and preventing energy loss.

Operating Your Danfoss Thermostat
Danfoss thermostats offer precise temperature control. Understanding numbered settings, adjusting heat levels, utilizing frost protection, and employing child safety locks ensures optimal comfort and efficiency.
Understanding the Numbered Settings
Danfoss thermostat heads utilize a numbered scale, typically ranging from 1 to 5, to indicate desired room temperature. These numbers don’t represent specific degrees, but rather relative heat levels, offering a user-friendly approach to temperature management.
Generally, ‘1’ signifies a cooler setting, ideal for maintaining a minimum temperature and conserving energy, while ‘5’ represents the warmest setting for rapid heating. Intermediate settings, ‘2’, ‘3’, and ‘4’, provide graduated levels of warmth, allowing for personalized comfort.
It’s important to note that the actual room temperature achieved at each setting will vary based on factors like radiator size, room insulation, and external weather conditions. Experimentation is key to finding the settings that best suit your individual needs and preferences. Many users find that ‘3’ provides a comfortable balance between warmth and energy savings.
Furthermore, some models may include additional markings or symbols to indicate specific functions, such as frost protection or economy mode. Refer to your specific thermostat model’s documentation for detailed information on its unique features and settings.
Adjusting the Temperature
To adjust the temperature on your Danfoss radiator thermostat, gently rotate the thermostat head. Turning it clockwise increases the desired heat level, moving towards higher numbers on the scale, while rotating it counter-clockwise decreases the temperature. A distinct clicking sound often indicates each incremental change in setting.
Avoid forcing the head, as this could damage the internal mechanism. Make small adjustments and allow sufficient time – typically 20-30 minutes – for the radiator to respond and the room temperature to stabilize before making further changes.
Remember that the numbered settings are relative, not absolute temperatures. Finding your ideal setting involves experimentation, considering factors like room size, insulation, and personal comfort preferences.
For smart Danfoss Eco thermostats, temperature adjustments can also be made conveniently through the dedicated mobile app, offering remote control and scheduling capabilities for enhanced comfort and energy efficiency.
Using the Frost Protection Setting
The frost protection setting, often indicated by a snowflake symbol (*) on your Danfoss thermostat, is crucial for preventing freezing pipes during cold weather, even when the heating system is off. This setting maintains a minimal temperature, typically around 5-8°C (41-46°F), safeguarding your plumbing from damage.
To activate frost protection, rotate the thermostat head until the snowflake symbol aligns with the reference point. This ensures that a small amount of heat is continuously emitted, preventing water within the radiator and pipes from freezing and potentially bursting.
This feature is particularly useful for unoccupied properties or rooms prone to cold drafts. Remember to deactivate frost protection when you return or wish to resume normal heating operation by adjusting the thermostat to your desired temperature setting.
Regularly check that the snowflake symbol is correctly aligned during extended periods of cold weather to guarantee adequate frost protection.
Locking the Thermostat (Child Safety)
Danfoss thermostats often include a locking mechanism to prevent accidental or unauthorized adjustments, particularly important in households with young children. This feature restricts the rotation of the thermostat head, ensuring the set temperature remains unchanged.
The locking function is typically activated by using a small tool, like a screwdriver or the key provided with some models, to engage a locking pin or switch located on the thermostat head. Once locked, the head will resist turning, preventing alterations to the temperature setting.
To unlock the thermostat, simply use the same tool to disengage the locking mechanism. Always keep the tool in a safe place, away from children. Regularly check the locking mechanism to ensure it functions correctly.
This simple precaution provides peace of mind, maintaining a consistent and safe temperature within your home environment.

Troubleshooting Common Issues
Addressing stuck heads, unresponsive adjustments, or valves failing to close is crucial. Replacing the thermostat insert (Ventileinsatz) resolves many operational problems efficiently.
Thermostat Head Stuck or Difficult to Turn
A stuck or difficult-to-turn Danfoss thermostat head is a common issue, often stemming from limescale buildup or corrosion within the valve mechanism. Before attempting forceful rotation, gently try to loosen it by slightly wiggling it back and forth. Avoid excessive force, as this could damage the valve itself.
If the issue persists, carefully remove the thermostat head (refer to the ‘Removing an Old Thermostat Head’ section for guidance). Inspect the pin and valve body for visible deposits. A mild descaling solution, applied cautiously, can help dissolve limescale. Ensure the solution is compatible with the thermostat materials.
After cleaning, lubricate the pin with a silicone-based lubricant – never use oil-based lubricants, as they can attract dust and worsen the problem. Reattach the head, ensuring a secure fit. If the head remains stuck after these steps, the valve itself may require professional attention or replacement.
Remember to consult online forums for similar experiences and solutions shared by other users.
Thermostat Not Responding to Adjustments
If your Danfoss thermostat isn’t responding to temperature adjustments, several factors could be at play. First, verify the thermostat isn’t locked – check the locking mechanism (see ‘Locking the Thermostat (Child Safety)’ section). Ensure the thermostat head is correctly seated on the valve body; a loose connection prevents proper operation.
A common cause is a faulty thermostat insert (Ventileinsatz). If the insert is defective, it won’t translate your adjustments into valve movements. Replacing the insert is often the solution (refer to ‘Replacing the Thermostat Insert (Ventileinsatz)’).
Also, confirm the heating system is functioning correctly – check the boiler and other radiators. If the system pressure is low, thermostats may not respond. If problems persist after these checks, consult a qualified heating engineer. Online forums may offer insights from users facing similar issues.
Remember to always prioritize safety when troubleshooting heating systems.
Valve Hanging or Not Closing Properly
A Danfoss radiator valve that’s hanging or failing to close completely indicates a potential issue with the valve mechanism itself. This often stems from accumulated debris or corrosion within the valve body, hindering smooth operation. Attempting to force the valve can cause further damage, so proceed cautiously.
First, try gently rotating the thermostat head back and forth several times. This may dislodge minor obstructions. If this fails, the thermostat insert (Ventileinsatz) is a likely culprit and should be inspected and potentially replaced (see ‘Replacing the Thermostat Insert (Ventileinsatz)’).
In some cases, the valve may require professional cleaning or replacement. Online forums suggest that older Danfoss valves can sometimes become problematic. If you’re uncomfortable disassembling the valve, consult a qualified heating engineer for assistance. Ignoring this issue can lead to energy waste and system inefficiency.
Always ensure the heating system is switched off before attempting any repairs.
Replacing the Thermostat Insert (Ventileinsatz)
Replacing the Danfoss Ventileinsatz (thermostat insert) is often the solution for a malfunctioning valve. Begin by turning off the heating system and allowing the radiator to cool. Carefully unscrew the thermostat head, and then use a suitable tool (often a spanner) to remove the old insert.
Before installing the new insert, inspect the valve body for any debris or corrosion. Clean as necessary. Gently screw in the new Ventileinsatz, ensuring it’s snug but not overtightened.
Reattach the thermostat head and test the system. Online resources indicate this is a common repair for Danfoss radiators. Ensure the new insert is compatible with your specific Danfoss thermostat model. If you encounter difficulties, or are unsure about any step, consult a qualified heating technician. A properly replaced insert restores efficient radiator control.
Always double-check compatibility before purchasing a replacement insert.
Advanced Features & Settings
Explore sophisticated options! Adjust flow rates (Durchflussmenge) for balanced heating, utilize the Danfoss Eco app for smart control, and integrate seamlessly with existing smart home systems.
Setting the Flow Rate (Durchflussmenge)
Understanding Flow Rate Adjustment: The ‘Durchflussmenge’ or flow rate setting on your Danfoss thermostat is crucial for optimizing radiator performance and overall heating system efficiency. This feature allows you to regulate the amount of hot water flowing through the radiator, ensuring balanced heat distribution throughout your home. Incorrect settings can lead to some radiators being too hot while others remain cold.
How to Adjust: Typically, adjusting the flow rate involves partially or fully opening the valve within the thermostat head. Accessing this valve often requires removing the thermostat head itself. Use a specialized tool or carefully use pliers to gently turn the valve. A higher flow rate delivers more heat, while a lower rate reduces it.
Balancing Your System: Start by fully opening all radiator valves. Then, gradually reduce the flow rate on the radiators closest to the boiler, working your way towards those furthest away, until all radiators achieve a comfortable and even temperature. This process, known as balancing, maximizes efficiency and minimizes energy waste. Remember to consult a professional if you are unsure about making these adjustments.
Using Danfoss Eco App (for Smart Thermostats)
Danfoss Eco App Overview: The Danfoss Eco app unlocks the full potential of your smart Danfoss radiator thermostats, providing remote control and intelligent heating management. Download the app from your device’s app store and follow the on-screen instructions to create an account and connect your thermostats.
Key Features: Through the app, you can adjust temperatures remotely, create customized heating schedules tailored to your lifestyle, and monitor energy consumption. Geofencing capabilities automatically adjust the heating based on your location, saving energy when you’re away.
App Navigation: The intuitive interface allows easy control of individual radiators or entire zones. You can also receive alerts for unusual temperature fluctuations or low battery levels. Explore the app’s settings to personalize your experience and optimize your heating system for maximum comfort and efficiency. Regular updates ensure continued performance and new features.
Integration with Smart Home Systems
Seamless Connectivity: Danfoss Eco smart thermostats are designed for integration with popular smart home ecosystems, enhancing your connected living experience. Compatibility includes systems like Amazon Alexa, Google Assistant, and Apple HomeKit, allowing voice control and centralized management of your heating.
Voice Control: Simply use voice commands to adjust temperatures, set schedules, or check the status of your radiators. This hands-free convenience adds a new level of comfort to your smart home setup.
Automated Scenarios: Integrate your Danfoss thermostats into broader smart home routines. For example, create a “Goodnight” scenario that lowers the temperature throughout the house with a single command. Explore the possibilities for energy savings and personalized comfort through seamless integration with your existing smart home infrastructure.

Maintenance and Care
Regular cleaning and occasional battery replacements (for electronic models) ensure optimal performance. Proper long-term storage prevents damage and prolongs the lifespan of your Danfoss thermostat.
Cleaning Your Danfoss Thermostat
Maintaining a clean thermostat is crucial for accurate temperature readings and reliable operation. Dust and grime can accumulate over time, potentially hindering the internal mechanisms and affecting performance. For mechanical Danfoss thermostats, gently wipe the exterior with a soft, dry cloth. Avoid using abrasive cleaners or solvents, as these can damage the finish.
For electronic models, ensure the thermostat is switched off before cleaning. A slightly damp cloth can be used, but avoid getting any moisture inside the unit. Never immerse the thermostat in water or any other liquid. Pay particular attention to cleaning around the temperature adjustment dial and any display screens.
Regular cleaning, ideally a few times a year, will help keep your Danfoss thermostat functioning optimally and extend its lifespan. A clean thermostat contributes to a more efficient heating system and a comfortable home environment. Remember to always handle the thermostat with care during the cleaning process.
Battery Replacement (for Electronic Models)
Danfoss electronic thermostats require batteries to operate. When the batteries are low, the display may dim or show a low battery indicator. Replacing the batteries is a straightforward process, ensuring continued functionality. First, locate the battery compartment, typically on the front or side of the thermostat head.
Using a small screwdriver, carefully open the compartment and remove the old batteries. Note the correct polarity (+ and -) before removal. Insert new, high-quality alkaline batteries of the correct size, ensuring they are oriented correctly. Close the battery compartment securely.
Always dispose of used batteries responsibly, following local regulations. After replacing the batteries, the thermostat should resume normal operation. If issues persist, consult the troubleshooting section of this guide. Regular battery checks, especially during heating season, will prevent unexpected interruptions.
Long-Term Storage
If storing your Danfoss radiator thermostat for an extended period, such as during the off-season or when renovating, proper preparation is crucial. Begin by thoroughly cleaning the thermostat head with a dry cloth to remove any dust or debris. Remove the batteries from electronic models to prevent corrosion and potential damage during storage.
Store the thermostat in a cool, dry place, away from direct sunlight and extreme temperatures. Ideally, keep it in its original packaging or a protective container to prevent physical damage. Avoid storing it in damp environments, as moisture can affect the internal components.
Before reinstalling, inspect the thermostat for any signs of damage. Ensure the valve insert (Ventileinsatz) is clean and free of obstructions. Proper storage ensures your Danfoss thermostat remains in optimal condition for years of reliable service.