
click clock cube manual
Gingko’s Click Clock Cube is a modern timepiece, blending style and function with a unique cube design and intuitive controls, as detailed in its user manual.
What is the Click Clock Cube?
The Click Clock Cube, as outlined in the manual, is an innovative alarm clock and display device. It distinguishes itself with a minimalist, cube-shaped aesthetic and a unique interaction method. Unlike traditional clocks, it utilizes touch-sensitive pins for snoozing and a gravity-activated alarm system.
The manual details how the cube displays time, date, and temperature, offering both sound-activated and permanent display modes. It’s designed to be a blend of functionality and modern design, suitable for bedside tables or office spaces. The manual emphasizes its user-friendly interface and sleek appearance.
Key Features and Benefits
According to the manual, key features of the Click Clock Cube include its sound-activated LED display, allowing time checks with a simple clap or tap. The manual highlights the gravity-controlled alarm, eliminating jarring sounds. Benefits include customizable time formats (12/24 hour) and adjustable brightness.
The manual also details magnetized pins for easy manipulation and a sleek, modern design. It’s a practical and stylish addition to any space. The manual emphasizes ease of use and a unique alarm experience, offering a refreshing alternative to conventional alarm clocks.

Unboxing and Initial Setup
The manual guides users through unboxing, confirming package contents, and provides initial setup instructions for a seamless first-time experience with the Click Clock Cube.
Package Contents
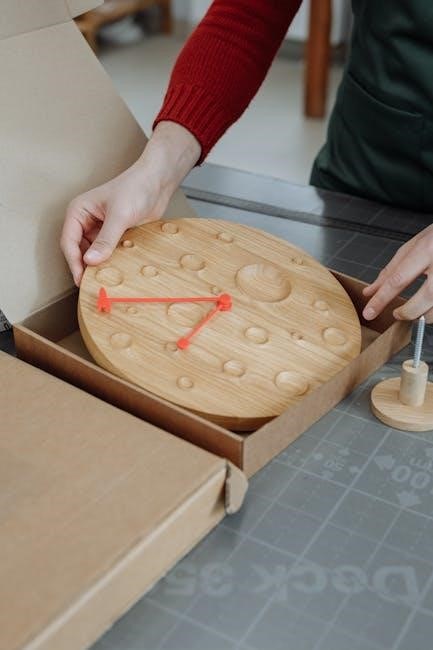
According to the Click Clock Cube manual, upon unboxing, you should find the main cube unit itself, meticulously designed with a sleek aesthetic. Included are the magnetized pins, essential for the unique interaction and alarm functionality. The package also contains a USB to USB-C cable, used for powering the device – eliminating the need for batteries.
Furthermore, the manual confirms the inclusion of a quick start guide, offering a simplified overview of initial setup. A more comprehensive user manual, available for download, provides detailed instructions and troubleshooting tips. Ensure all listed components are present before proceeding.
Powering On and Basic Operation
The Click Clock Cube manual details a simple power-up process: connect the provided USB-C cable to the cube and a USB power source. The cube activates immediately, displaying the time if previously set. Basic operation revolves around the magnetized pins; gently pushing them activates functions.
The manual explains that a quick tap on the top surface, or a nearby sound, will illuminate the display in sound-activated mode. Further pin manipulation, as outlined in the manual, allows switching between display modes and accessing other features.

Understanding the Display
The Click Clock Cube manual explains the LED display shows time, date, and temperature, switching between sound-activated and permanent modes for visibility.
Sound-Activated Mode
According to the Click Clock Cube manual, this mode conserves battery life by keeping the display dark until triggered by a sound. A simple clap or tap near the cube instantly illuminates the LED display, showing the time, date, and temperature.
The sensitivity isn’t adjustable, but the manual suggests a moderate sound level for reliable activation. This feature is ideal for bedrooms, preventing disruptive brightness during sleep, and offers a convenient way to check the time without fumbling for buttons. It’s a core function highlighted in user guides.
Permanent Display Mode
The Click Clock Cube manual details how to activate the permanent display mode, ensuring the time, date, and temperature are constantly visible. This mode bypasses the sound activation feature, providing continuous illumination.
However, the manual cautions that using permanent display mode will significantly reduce battery life. It’s best suited for situations where constant visibility is crucial, like a desk or countertop. Users can easily switch between sound-activated and permanent modes via a button on the device, as illustrated in the user guide.
Time, Date, and Temperature Display
According to the Click Clock Cube manual, the device elegantly displays the time, date, and temperature. The manual explains how the LED matrix showcases this information in a clear, modern format. Users can cycle through these displays with a gentle tap on the cube’s surface.
The manual also details how to configure the temperature unit (Celsius or Fahrenheit) and the time format (12 or 24-hour). Proper setup, as outlined in the guide, ensures accurate and personalized information display.

Setting Up the Clock
The Click Clock Cube manual guides users through initial setup, including time, date, and temperature unit configuration, ensuring personalized functionality and accurate readings.
Setting the Time
According to the Click Clock Cube manual, setting the time involves a specific sequence of button presses. Initially, long-press the ‘Set’ button to enter time adjustment mode. Use the touch-sensitive top surface to cycle through hours, then minutes, adjusting each value as needed. The manual emphasizes precise adjustments for accurate timekeeping.
Confirm each setting by briefly pressing ‘Set’ again. Remember to choose between 12 or 24-hour format via the settings menu, detailed within the manual, for preferred display. Incorrect time settings can affect alarm functionality, so careful configuration is crucial.
Setting the Date
The Click Clock Cube manual details date setting after time configuration. Following time adjustment, another long-press of the ‘Set’ button initiates date mode. Utilize the touch-sensitive surface to cycle through year, month, and day, modifying each value accordingly. The manual stresses verifying the date format (MM/DD/YYYY or DD/MM/YYYY) within settings.
Confirm each date component with a short ‘Set’ press. Accurate date setting is vital for proper display and potential calendar-related features. Refer to the manual’s diagrams for visual guidance during this process, ensuring correct date input.
Setting the Temperature Unit (Celsius/Fahrenheit)
The Click Clock Cube manual explains temperature unit selection after date configuration. A prolonged press of the ‘Set’ button, following date setting, enters temperature unit mode. Touch the surface to toggle between Celsius (°C) and Fahrenheit (°F). The manual highlights a small icon on the display indicating the currently selected unit.
Confirm your preference with a short press of the ‘Set’ button. Accurate unit selection ensures correct temperature readings. Consult the manual’s illustrations for visual confirmation of the temperature unit icon, guaranteeing proper display.
Alarm Functionality
The Click Clock Cube manual details setting alarms via button presses, featuring a gravity-activated snooze and customizable sound options for a gentle wake-up.
Setting the Alarm
According to the Click Clock Cube manual, setting the alarm involves a series of button presses on the device. First, press and hold the ‘Set’ button until the alarm icon begins to flash. Then, use the up and down buttons to adjust the desired alarm hour. Repeat this process to set the alarm minutes.
Confirm your settings by pressing the ‘Set’ button again. The alarm icon will remain solid, indicating the alarm is active. Remember to consult the manual for specific button locations and detailed instructions, as variations may exist depending on the model.
Snooze Function
The Click Clock Cube manual highlights the innovative snooze feature activated by a simple ‘click’ – a touch on any side of the cube; When the alarm sounds, gently tap the cube to enter a nine-minute snooze cycle. This touch-sensitive snooze eliminates the need to locate buttons in the dark, offering convenience.
Repeated clicks will continue the snooze cycle. To fully disable the alarm, refer to the manual for instructions on deactivating it completely. The cube’s responsiveness ensures a seamless and user-friendly snooze experience.
Gravity-Controlled Alarm Activation
The Click Clock Cube manual details its unique gravity-controlled alarm feature. Unlike traditional alarms, this cube doesn’t require a button press to silence it. Instead, gently tilt the cube to any side to deactivate the alarm. This innovative approach minimizes fumbling in the dark and provides a more natural wake-up experience.
The manual emphasizes that a sufficient tilt angle is necessary for activation. Experiment to find the optimal angle for reliable silencing. This feature adds a distinctive and convenient element to the alarm functionality.
Advanced Features & Customization
The Click Clock Cube manual explains options like time format (12/24 hour), brightness adjustments, and magnetized pin handling for personalized use.
Time Format (12/24 Hour)
The Gingko Click Clock Cube manual details how to easily switch between 12-hour and 24-hour time display formats. This customization caters to user preference, offering a familiar time representation. Accessing this setting typically involves a specific button combination or sequence, clearly outlined within the manual’s instructions.
The manual provides step-by-step guidance, ensuring a smooth transition between formats. This feature enhances the clock’s usability, allowing individuals to view the time in their preferred style. Understanding this setting is crucial for correctly interpreting the displayed time, especially for those accustomed to a particular format.
Brightness Adjustment
The Gingko Click Clock Cube manual explains how to adjust the LED display’s brightness to suit various ambient lighting conditions. This feature prevents the display from being too harsh at night or too dim during the day. The manual typically details a button or sequence to cycle through different brightness levels.
Users can customize the display’s intensity for optimal visibility and comfort. Following the manual’s instructions ensures the brightness is adjusted correctly, preserving battery life and enhancing the overall user experience. This adjustment is key to a pleasant viewing experience in any environment.
Magnetized Pins – Purpose and Handling
The Gingko Click Clock Cube manual clarifies the purpose of the magnetized pins: they facilitate easy placement and secure attachment, enhancing the cube’s interactive functionality. The manual stresses careful handling, as strong magnets can damage electronic components.
Users are advised to avoid proximity to sensitive devices like credit cards or pacemakers. The manual may detail a magnetization process for pins that lose their magnetic charge. Proper handling, as outlined in the manual, ensures longevity and optimal performance of this unique feature.

Troubleshooting Common Issues
The Click Clock Cube manual offers solutions for display, alarm, and time/date inaccuracies, guiding users through common problems and their resolutions.
Display Not Lighting Up
According to the Click Clock Cube manual, if the display fails to illuminate, first ensure the device is properly powered. Verify the connection if using external power.
If utilizing sound activation, confirm sufficient ambient noise is present – a simple snap or tap should suffice. The manual also suggests checking the brightness settings; it may be set too low.
In permanent display mode, a malfunction could indicate a need for troubleshooting or contacting support. Refer to the manual’s section on resetting the device as a potential fix.
Alarm Not Sounding
The Click Clock Cube manual details several reasons why the alarm might not activate. First, confirm the alarm is correctly set and enabled within the device’s settings. Ensure the gravity-controlled activation is unobstructed; the cube needs to be stable.
Check the volume level – it may be muted or set too low. The manual advises verifying the time format (12/24 hour) hasn’t inadvertently disabled the alarm.
If issues persist, a reset, as outlined in the manual, could resolve software glitches preventing alarm functionality.
Incorrect Time/Date
According to the Click Clock Cube manual, inaccurate time or date displays usually stem from improper initial setup. Refer to the “Setting the Time” and “Setting the Date” sections within the manual for detailed instructions on manual adjustment.
Ensure the correct time format (12 or 24-hour) is selected, as this impacts display and setting procedures. If the issue continues, a full reset, guided by the manual, can restore default settings and allow for a fresh configuration.
Verify power stability, as interruptions can sometimes cause synchronization errors.

Maintenance and Care
The Click Clock Cube manual recommends gentle cleaning with a soft cloth and pin maintenance for optimal performance and longevity of the device.
Cleaning the Cube
According to the Click Clock Cube manual, maintaining the cube’s aesthetic appeal is simple. Use a soft, dry cloth to gently wipe the exterior surfaces, removing dust and fingerprints. Avoid abrasive cleaners or harsh chemicals, as these could damage the finish.
For stubborn marks, lightly dampen the cloth with water, ensuring it’s not dripping wet. Never spray liquid directly onto the cube. Pay particular attention to the LED display area, but avoid applying excessive pressure. Regular, gentle cleaning will keep your Click Clock Cube looking its best for years to come.
Pin Maintenance
The Click Clock Cube manual emphasizes careful handling of the magnetized pins. Regularly check that pins move freely; if resistance is felt, a tiny amount of lubricant (like silicone grease – as suggested by user experiences) can be applied. Avoid over-lubrication, as this attracts dust.
Ensure pins are securely seated after each use. If pins become demagnetized, refer to the magnetization section of the manual for instructions. Gentle cleaning with a soft cloth will remove any residue, preserving smooth operation and responsiveness.
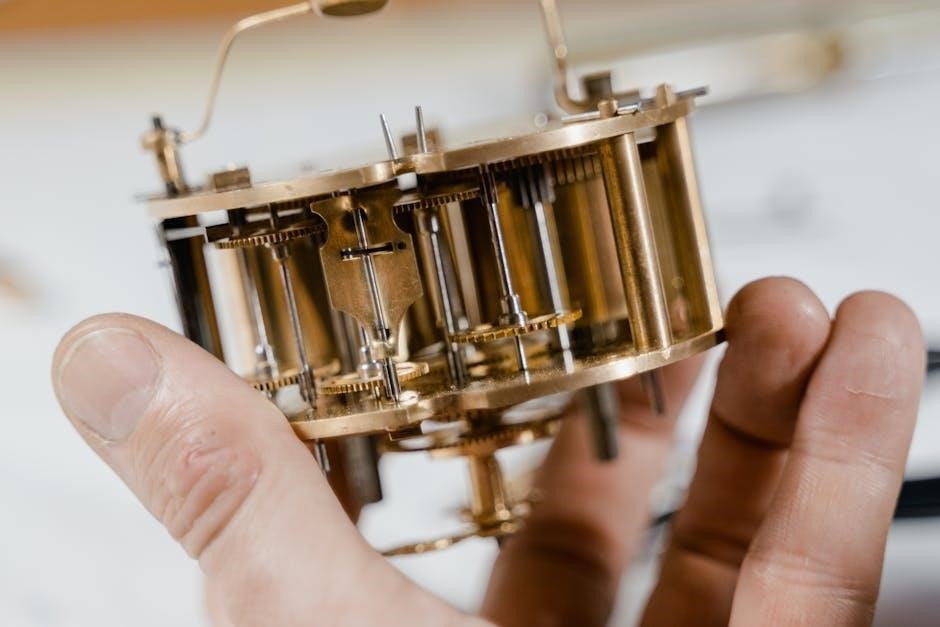
Disassembly and Reassembly (Advanced)
The Click Clock Cube manual doesn’t detail disassembly; however, online resources (like the Corner Cutter podcast) suggest careful prying and note lubrication is key.
Tools Required
While the Gingko Click Clock Cube manual doesn’t explicitly guide disassembly, advanced users attempting it will need specific tools. A small, flat-head screwdriver is crucial for gently prying apart the cube’s casing, avoiding damage to the internal components. Precision tweezers are helpful for handling the delicate pins and circuit board elements.
Lubricant, such as silicone grease, is recommended for smooth pin action after reassembly. A magnetic tool or strong magnet is essential for re-magnetizing the pins, as described in user modifications. Finally, a clean, well-lit workspace is vital to prevent lost parts and ensure careful handling throughout the process.
Step-by-Step Disassembly Guide
The Gingko Click Clock Cube manual doesn’t offer disassembly instructions, so proceed cautiously. Begin by gently applying a flat-head screwdriver to a corner seam, carefully prying to release the casing. Work your way around, releasing each side incrementally. Once open, disconnect the battery.
Note the pin arrangement before removing them. The circuit board is secured with minimal fasteners; document their locations. Handle components delicately, avoiding stress on the LED matrix. Remember, disassembly voids any warranty and is undertaken at your own risk.
Step-by-Step Reassembly Guide
Following disassembly, referencing your documented photos is crucial. Carefully reattach the circuit board, ensuring all fasteners are correctly positioned – the Click Clock Cube manual lacks diagrams. Reconnect the battery, verifying polarity. Gently align the cube’s casing, pressing each side firmly until it clicks into place.
Test functionality before fully securing the seams. Reinsert the magnetized pins, observing their original arrangement. A snug fit indicates proper reassembly. Remember, patience and precision are key to a successful rebuild.

Magnetization of Pins
The manual doesn’t cover magnetization; however, strong magnets enhance pin stability, aiding the “click” action, as discussed in online communities and repair guides.
Tools and Materials
While the Click Clock Cube manual doesn’t detail magnetization, enthusiasts recommend specific tools. You’ll need strong neodymium magnets – disc or cylindrical shapes work best. A secure fixture to hold the pins during magnetization is crucial; small clamps or a vise are helpful.
Additionally, a demagnetization tool might be useful if over-magnetization occurs. Safety glasses are essential to protect your eyes from flying debris. Finally, a clean workspace and gloves are recommended to prevent contamination and ensure a controlled process, as discussed in online repair guides.
Magnetization Process
The Click Clock Cube manual lacks magnetization instructions, so online resources are key. Slowly stroke each pin with the neodymium magnet in a single direction – do not rub back and forth. Repeat this several times, ensuring consistent polarity. Test the pin’s attraction to the cube’s metal base after each pass.
Avoid over-magnetization, which can cause pins to stick excessively. If this happens, use a demagnetization tool. Patience is vital; a gradual build-up of magnetism yields the best results, enhancing the click experience.
Resources and Support
Access the official Gingko website for product details and download the Click Clock Cube manual for comprehensive guidance and troubleshooting assistance.
Official Gingko Website
Gingko’s official website serves as the primary hub for all information related to the Click Clock Cube. Here, you’ll discover detailed product specifications, high-resolution images showcasing the cube’s design, and frequently updated news regarding potential firmware updates or new features.
Crucially, the website provides direct access to download the official Click Clock Cube manual in PDF format. This manual contains comprehensive instructions on setup, operation, troubleshooting, and maintenance, ensuring you can fully utilize all the cube’s capabilities. Support contact information is also readily available for direct assistance.
User Manual Download
Accessing the Click Clock Cube manual is straightforward. Several online resources host the PDF document, offering comprehensive guidance for users. A dedicated database currently contains 2 Gingko Click Clock Cube manuals available for free viewing or download.
The manual details everything from initial setup and time configuration to alarm functionality and advanced customization options. It’s an invaluable resource for understanding the cube’s features and resolving any operational issues. Ensure you download the latest version from a trusted source for accurate information.

Frequently Asked Questions (FAQ)
Consult the Click Clock Cube manual for detailed answers to common questions regarding operation, troubleshooting, and maximizing the device’s unique features.
Is the clock truly a cube?
While marketed as a “cube,” the Click Clock Cube isn’t a perfect geometric cube. The manual doesn’t explicitly address this, but online reviews note the design is more of a rounded rectangular prism. This shape allows for internal components and a comfortable grip.
Despite not being a true cube, the aesthetic maintains a cubic impression, offering a modern and minimalist look. The manual focuses on functionality rather than precise geometric definitions, emphasizing its innovative features and user experience.
How sensitive is the sound activation?
The Click Clock Cube’s manual doesn’t detail specific decibel levels for sound activation, but users report high sensitivity. A simple finger snap, tap on a table, or even a quiet voice generally activates the display. However, sensitivity can be affected by ambient noise.
Some users find it too sensitive, triggering with everyday sounds. The manual doesn’t offer adjustment options for sensitivity. Experimentation with placement and surrounding environment is recommended to optimize performance and avoid unwanted activations.