g6a-7e water heater manual
Welcome! This manual provides essential guidance for safe installation, operation, and maintenance of your new g6a-7e water heater, ensuring years of reliable service.
What is the g6a-7e Model?
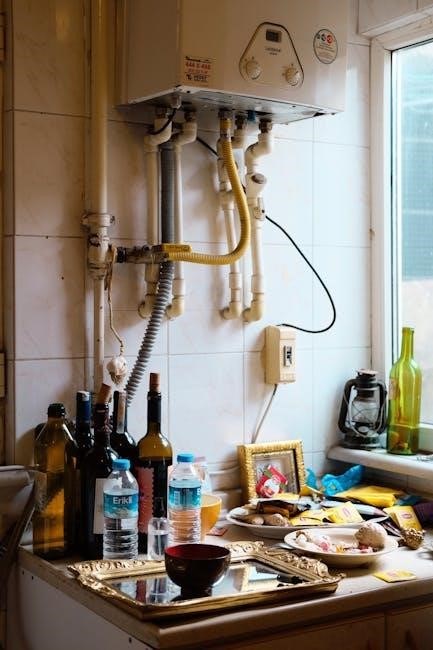
The g6a-7e is a high-efficiency, tankless gas water heater designed to provide on-demand hot water for residential and light commercial applications. Unlike traditional tank water heaters that continuously heat and store water, the g6a-7e heats water only when a hot water tap is turned on.
This innovative technology eliminates standby heat loss, resulting in significant energy savings and reduced utility bills. The g6a-7e boasts a compact design, making it ideal for installations where space is limited. It’s engineered for consistent hot water delivery, even during periods of high demand, supporting multiple fixtures simultaneously.
Furthermore, the g6a-7e features advanced safety mechanisms and a user-friendly interface for easy operation and monitoring. Its durable construction ensures long-lasting performance and reliability, making it a smart investment for any homeowner or business owner seeking a dependable and efficient hot water solution.
Key Features and Specifications
The g6a-7e water heater offers several key features, including a high-efficiency burner achieving up to 98% thermal efficiency, digital temperature control for precise adjustments, and a built-in self-diagnostic system for simplified troubleshooting. Its compact size (26.8” H x 18.1” W x 12.6” D) allows for versatile installation options.
Specifications: Input BTU: 199,900 (Max), Gas Type: Propane or Natural Gas (conversion kit required), Minimum Gas Flow: 25,000 BTU/hr, Hot Water Output: 6.6 ⸺ 11.0 GPM (depending on temperature rise), Temperature Rise: Up to 77°F, Venting: Category III, Electrical: 120V/60Hz/0.5A.
Additional features include freeze protection, overheat protection, and a stainless-steel heat exchanger for enhanced durability and corrosion resistance. The unit also supports both indoor and outdoor installations (with appropriate venting) and offers a user-friendly digital display for monitoring performance and adjusting settings.
Safety Precautions
Important: Read all instructions carefully before installing or operating this water heater to prevent fire, explosion, electric shock, or carbon monoxide poisoning.
General Safety Warnings
Caution! This water heater presents potential hazards if not installed and used correctly. Always disconnect the gas and electrical supply before performing any maintenance or servicing. Never operate the unit if it shows signs of damage, such as leaks, corrosion, or unusual noises.
Keep combustible materials, like paper and flammable liquids, well away from the water heater. Ensure adequate ventilation in the area to prevent the buildup of hazardous fumes. Children should be supervised around the unit and not allowed to play with the controls.
Do not attempt to modify or repair the water heater yourself unless you are a qualified technician. Improper repairs can lead to dangerous conditions. Regularly inspect the unit and its connections for any signs of wear or damage. Always follow local codes and regulations regarding installation and operation. Failure to heed these warnings could result in property damage, injury, or even death.
Electrical Safety
Warning! Electrical shock hazard exists. Always ensure the water heater is properly grounded according to local electrical codes before connecting to the power supply. Never use extension cords or adapters; plug directly into a dedicated circuit. Before performing any electrical work, always disconnect power at the circuit breaker or fuse box.
Inspect the power cord regularly for damage. If the cord is damaged, it must be replaced by a qualified electrician. Do not operate the water heater if it has been submerged in water. Avoid touching electrical components with wet hands or while standing in water.
Ensure the voltage and frequency of the power supply match the specifications listed on the water heater’s nameplate. Improper voltage can damage the unit and create a fire hazard. If you are unsure about any electrical aspect of the installation, consult a qualified electrician. Ignoring these precautions can lead to severe injury or death.
Gas Safety (if applicable)
Warning! Gas leak hazard. If you smell gas, do not operate any electrical switches or appliances. Immediately evacuate the area and call your gas company or fire department from a safe location. Never attempt to repair a gas leak yourself.
Ensure the gas supply is turned off before performing any maintenance or inspection of the gas connections. Use a gas leak detector to verify there are no leaks after connecting the gas line. All gas connections must be made by a qualified and licensed gas technician, adhering to local codes.
Proper ventilation is crucial for safe operation. Ensure the venting system is clear of obstructions and functioning correctly to prevent carbon monoxide buildup. Regularly inspect the burner flame for proper color and size – a yellow or flickering flame indicates incomplete combustion and requires immediate attention from a qualified technician.
Installation Guide
Professional installation is highly recommended! Carefully follow these instructions to ensure correct and safe setup of your g6a-7e water heater system.
Unpacking and Inspection
Upon receiving your g6a-7e water heater, carefully inspect the packaging for any signs of damage during transit. Do not accept delivery if the packaging appears significantly compromised.
Once delivered, gently unpack the unit, retaining all original packaging materials until you’ve confirmed the water heater is functioning correctly. A complete g6a-7e package should include the water heater itself, this installation and operating manual, any included accessories (like pressure relief valve extensions or mounting brackets), and potentially separate documentation for specific venting components.
Thoroughly examine the water heater for any visible defects – dents, scratches, or loose parts. Verify that all components listed in the included parts list are present. If any damage or missing parts are discovered, immediately contact the retailer or customer support (see Warranty Information section) before proceeding with installation. Document any damage with photographs for claim purposes. Failure to report damage promptly may void your warranty.
Mounting and Venting Requirements
Proper mounting and venting are crucial for safe and efficient operation of your g6a-7e water heater. The unit must be installed on a level, non-combustible surface capable of supporting its full weight when filled with water. Consult local building codes for specific floor load requirements.
Venting is essential to exhaust combustion gases safely. The g6a-7e requires a dedicated vent system, and must not be connected to a chimney serving another appliance. Use only approved venting materials specified by the manufacturer, ensuring proper diameter and pitch for optimal draft.
Maintain the required clearances to combustible materials as outlined in the installation diagrams. Incorrect venting can lead to carbon monoxide poisoning. Always verify adequate combustion air supply. Professional installation by a qualified technician is strongly recommended to ensure compliance with all applicable codes and safety standards.
Connecting Gas/Electrical Supply
Caution: These connections should only be performed by qualified and licensed technicians. Before proceeding, ensure the gas and electrical supplies are turned off at the main shut-off valves. For gas models, use a pipe dope specifically formulated for gas lines, applying it to all threaded connections to prevent leaks.
Connect the gas supply line to the heater’s gas inlet, verifying proper pipe size and tightness. Leak test all connections with a soap solution – bubbles indicate a leak. Electrical connections require adherence to local electrical codes.
Ensure the correct voltage matches the heater’s specifications. Ground the unit properly to prevent electrical shock. Never use extension cords. Double-check all connections before restoring gas and electrical supply. A final inspection by a qualified professional is highly recommended to confirm safe and correct installation.

Operating Instructions
Now ready, your g6a-7e water heater delivers consistent warmth. Follow these simple steps to enjoy hot water efficiently and safely for years to come.
Initial Startup Procedure
Before first use, a thorough initial startup is crucial for optimal performance and longevity of your g6a-7e water heater. Begin by fully opening the cold water inlet valve to allow the tank to fill completely. This process will purge any air from the system and is vital before applying power.
Listen carefully for water flowing from the hot water taps in your home; once a steady stream is present, it indicates the tank is full. Do not energize the heater until this step is confirmed! Next, if your model is gas-powered, follow the lighting instructions printed directly on the unit – typically involving turning the gas control knob to ‘Pilot’ and initiating ignition.
For electric models, switch on the circuit breaker supplying power to the water heater. Observe the unit for any unusual noises or leaks during the initial heating cycle. Allow several hours for the water to reach the desired temperature. Periodically check for leaks around all connections.
Adjusting Temperature Settings
Your g6a-7e water heater allows for precise temperature control to suit your household needs. Locate the temperature control dial, typically found on the front of the unit, often behind a small access panel. Caution: Water temperatures above 120°F (49°C) can cause scalding!
To increase the water temperature, turn the dial clockwise. To decrease it, turn counterclockwise. We recommend a setting of 120°F (49°C) as a safe and energy-efficient default. Allow several hours after each adjustment for the water to reach the new setpoint.
For digital models, use the ‘+’ and ‘-’ buttons on the control panel to adjust the temperature in increments. The current set temperature will be displayed on the screen. Regularly check the water temperature at a faucet to ensure it aligns with your desired setting. Avoid drastic temperature changes, as they can strain the system.
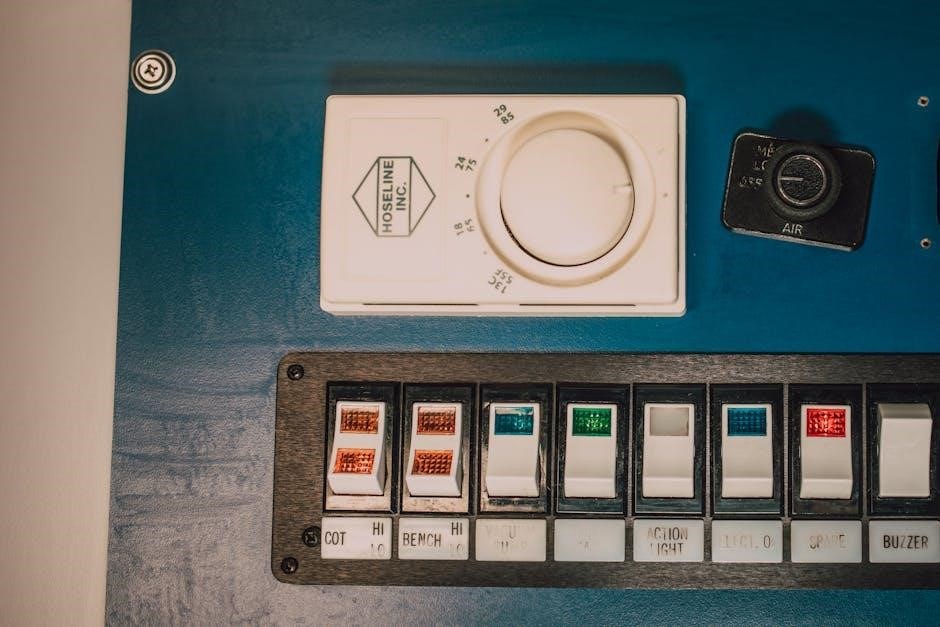
Understanding the Control Panel
The g6a-7e’s control panel is designed for intuitive operation and monitoring. Digital models feature an LCD screen displaying the current water temperature, set temperature, and any active error codes. Buttons typically include ‘Power’ for on/off control, ‘+’ and ‘-’ for temperature adjustment, and ‘Mode’ to cycle through operating modes (e.g., standard, vacation).
Older, non-digital models will have a simple temperature dial and potentially a reset button. The dial directly controls the water temperature. Familiarize yourself with the indicator lights; a ‘Heating’ light indicates the burner is active, while a ‘Ready’ light signifies the water is at the set temperature.
Refer to the diagram on page 15 for a detailed labeling of each control panel component. Understanding these controls is crucial for efficient and safe operation of your water heater.

Maintenance and Troubleshooting
Regular upkeep extends the life of your g6a-7e. This section details routine tasks and solutions for common problems, ensuring optimal performance and safety.
Regular Maintenance Tasks
To ensure optimal performance and longevity of your g6a-7e water heater, consistent maintenance is crucial. We recommend a yearly inspection by a qualified technician to assess overall system health and identify potential issues before they escalate.
Monthly, visually inspect the unit for any signs of leaks, corrosion, or damage. Check the temperature and pressure relief (T&P) valve by briefly lifting the lever – ensure water discharges freely and the valve reseats properly. Flush the tank every six months to remove sediment buildup, which can reduce efficiency and cause overheating. Follow the detailed flushing instructions in the ‘Operating Instructions’ section.
Periodically clean the burner assembly (for gas models) to ensure proper combustion. Inspect and tighten all gas connections, verifying no leaks are present. For electric models, check the wiring connections for tightness and corrosion. Remember to always disconnect power before performing any electrical maintenance. Maintaining these tasks will help guarantee safe and efficient operation.
Troubleshooting Common Issues
Experiencing problems with your g6a-7e? Here’s a guide to resolving frequent issues. No hot water: Check the power supply (electric) or gas supply (gas). Verify the thermostat is set correctly and hasn’t tripped. Insufficient hot water: Sediment buildup may be the cause – flush the tank. Consider increasing the thermostat setting (within safe limits).
Water is too hot: Lower the thermostat setting. Leaking tank: This is a serious issue; immediately shut off the water supply and contact a qualified plumber. Strange noises: Rumbling sounds often indicate sediment buildup. Popping sounds could signify overheating – turn off the unit.
Pilot light won’t stay lit (gas): Clean the pilot assembly and check the thermocouple. Always prioritize safety! If you’re uncomfortable performing any troubleshooting steps, consult a professional. Refer to the ‘Error Codes’ section for specific diagnostic information.
Error Codes and Their Meanings
The g6a-7e utilizes a diagnostic system displaying error codes to pinpoint issues. E1: Overheat condition – shut off the unit and contact service. E2: Flame sensor failure (gas models) – check the flame sensor and gas supply. E3: Low water flow – inspect the water inlet valve and piping.
E4: High temperature sensor fault – replace the temperature sensor. E5: Gas valve malfunction (gas models) – requires professional repair. E6: Ignition failure (gas models) – check the igniter and gas supply. E7: Low voltage – verify the electrical supply.
E8: Communication error – reset the control board. Note: These codes are guidelines. Always consult a qualified technician for accurate diagnosis and repair. Ignoring error codes can lead to further damage or unsafe operating conditions. Do not attempt repairs beyond your skill level!
Parts and Diagrams
Detailed illustrations and component lists are provided for easy identification of parts, aiding in maintenance and facilitating efficient replacement procedures.
Exploded View Diagram
The following diagram presents a comprehensive, exploded view of the g6a-7e water heater assembly. This visual representation meticulously details each component and its precise location within the unit. Refer to this diagram in conjunction with the ‘Common Replacement Parts’ section to accurately identify parts during maintenance or repair procedures.
Each numbered item in the diagram corresponds to a specific part listed in the accompanying parts list. Pay close attention to the orientation and positioning of each component as shown. Note the various seals, gaskets, and fasteners – these are crucial for proper operation and preventing leaks.
[Insert Exploded View Diagram Here – Placeholder]
Understanding this diagram will significantly simplify troubleshooting and ensure you use the correct replacement parts when needed. Always disconnect power and gas (if applicable) before disassembling any part of the water heater. Safety first!
Common Replacement Parts
Maintaining your g6a-7e water heater often requires replacing certain components over time. This section lists frequently needed replacement parts, along with their corresponding part numbers for easy ordering. Regularly inspect these items during maintenance to proactively address potential issues.
Key replacement parts include the thermostat (Part #G6A-7E-TH1), the heating element (Part #G6A-7E-HE2 – specify voltage), the temperature and pressure relief valve (T&P Valve ⎻ Part #G6A-7E-TP3), and various gaskets and seals (assorted ⸺ see detailed parts list). The anode rod (Part #G6A-7E-AR4) is crucial for corrosion prevention and should be checked annually.
[Insert Parts List Table Here – Placeholder]
Always use genuine g6a-7e replacement parts to ensure compatibility and maintain the heater’s performance and safety standards. Refer to the exploded view diagram to correctly identify the part you need before ordering.
Warranty Information
Your g6a-7e water heater is covered by a comprehensive warranty protecting against manufacturing defects in materials and workmanship for a specified period.
Warranty Coverage Details
Tank Warranty: The g6a-7e water heater tank is warranted against leaks due to corrosion for a period of ten (10) years from the date of installation, provided the water heater is installed in accordance with local codes and manufacturer’s instructions. This warranty covers the cost of the tank only, and does not include labor or other associated costs.
Parts Warranty: All other components of the g6a-7e water heater, including valves, heating elements, and controls, are warranted for a period of one (1) year from the date of installation. This warranty covers defects in materials and workmanship, and includes the cost of replacement parts and reasonable labor charges.
Limitations: This warranty does not cover damage caused by improper installation, misuse, abuse, neglect, freezing, sediment buildup, or acts of God. Warranty is void if the unit is modified or repaired by unauthorized personnel. Proof of purchase and installation date are required for all warranty claims.
Contacting Customer Support
For assistance with your g6a-7e water heater, our dedicated customer support team is available to provide expert guidance and resolve any issues you may encounter. We are committed to ensuring your complete satisfaction with our product.
Phone Support: You can reach our customer support representatives by calling 1-800-WATER-HEAT (1-800-928-3743). Our lines are open Monday through Friday, from 8:00 AM to 5:00 PM Eastern Time. Please have your model number (g6a-7e) and date of purchase readily available.
Online Support: Visit our website at www.examplewaterheaters.com/support for frequently asked questions, troubleshooting guides, downloadable manuals, and the ability to submit a support request online. We aim to respond to all online inquiries within 24-48 hours. Email: support@examplewaterheaters.com