
honeywell home pro series installation manual
Honeywell Home Pro Series Installation Manual: A Comprehensive Guide
This comprehensive guide details installation of the Honeywell T4 Pro, T6 Pro Series thermostats, covering wiring, app setup, and advanced features for professionals.
Understanding the Honeywell Home Pro Series
The Honeywell Home Pro Series represents a significant advancement in smart home climate control, designed specifically for professional HVAC installers. These thermostats – including models like the T4 Pro and T6 Pro – offer enhanced features and streamlined installation processes compared to previous generations. A key benefit is the advanced algorithm that fixes deadband at 0°F, providing more precise temperature management.
The series caters to diverse heating and cooling systems, encompassing heat pumps, forced air, and hydronic setups. Installation is simplified through features like the UWP Mounting System and optional adapter plates for existing J-boxes. Furthermore, the Honeywell Home app unlocks hidden PRO installation features, enabling remote configuration and access to valuable diagnostic tools. Understanding these capabilities is crucial for maximizing efficiency and delivering optimal comfort to end-users.
Thermostat Models Covered
This installation manual primarily focuses on the Honeywell Home Pro Series thermostats, with detailed guidance applicable to several key models. Specifically, the guide comprehensively covers the T4 Pro thermostat (T4 Pro Installation) and the T6 Pro thermostat. These models represent the core of the Pro Series, offering a balance of features and affordability for a wide range of residential applications.
Additionally, the manual references the TH3000 Series, a non-programmable digital thermostat within the Honeywell ecosystem. While the primary focus remains on the ‘Pro’ models, understanding the TH3000’s basic functionality is beneficial. It’s important to note that certain advanced features, like Backup Heat Droop, are exclusive to specific models, such as the TH4210U. Always verify the model number before proceeding with installation.
Required Tools and Materials
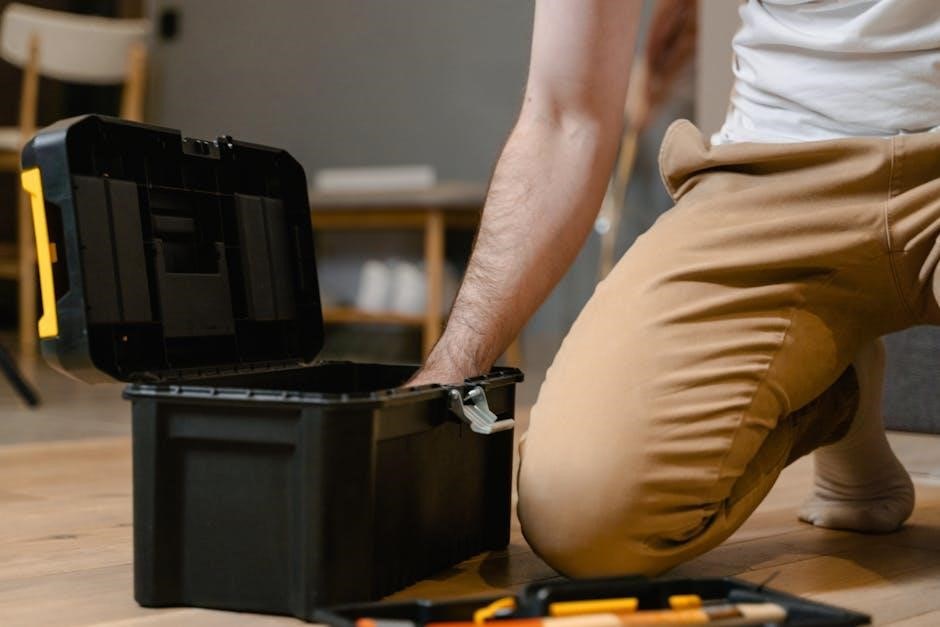
For a successful Honeywell Home Pro Series thermostat installation, gather the following tools and materials. Essential tools include a screwdriver set (various heads), wire strippers, pliers, a level, and a drill with appropriate bits for mounting. A voltage tester is crucial for safety, verifying power is off before wiring.
Materials needed encompass the Honeywell thermostat itself, mounting screws, wire labels for identification, and potentially a J-box adapter if your existing wall doesn’t have a suitable opening. Consider a decorative cover plate for aesthetic purposes. The UWP Mounting System may also be required depending on the installation scenario. Ensure you have access to the Honeywell Home app on a smartphone or tablet for setup and configuration.
Pre-Installation Considerations
Before beginning, verify system compatibility, prioritize safety by disconnecting power, and carefully identify existing thermostat wiring for a smooth installation process.

System Compatibility Check
Ensuring compatibility is crucial before installing your Honeywell Home Pro Series thermostat. These thermostats support various heating and cooling systems, including forced air (gas, oil, electric), heat pumps, and hydronic (hot water) systems; However, certain older or specialized systems might require adapters or may not be fully compatible.
Carefully review your existing heating/cooling system’s documentation or consult with an HVAC professional to determine your system type. Pay attention to voltage requirements; the Pro Series typically operates on 24V AC. Confirm your system doesn’t utilize line voltage (120V or 240V) thermostats, as these are incompatible and pose a safety risk.
If you are unsure, it’s always best to err on the side of caution and seek expert advice. Incorrect installation due to incompatibility can damage both the thermostat and your HVAC equipment.
Safety Precautions
Prioritizing safety during installation is paramount. Before beginning, ALWAYS disconnect power to your HVAC system at the breaker box to avoid electrical shock. Verify the power is off using a non-contact voltage tester. Improper handling of electrical wiring can lead to serious injury or death.
Exercise caution when working with wiring; even low-voltage systems can present hazards. If you are uncomfortable working with electrical components, consult a qualified HVAC technician. Wear appropriate safety glasses to protect your eyes from debris.
Be mindful of potential asbestos in older homes, particularly around ductwork. If you suspect asbestos, do not disturb it and contact a professional abatement service. Follow all local electrical codes and regulations during the installation process.
Identifying Existing Wiring
Carefully document your existing thermostat wiring before disconnecting anything. Take clear, well-lit photographs of the wiring connections to the old thermostat’s terminal block. Label each wire with its corresponding terminal designation (e.g., R, W, Y, G, C). This is crucial for accurate reconnection to the Honeywell Pro Series thermostat.
Common terminal designations include R (power), W (heat), Y (cooling), G (fan), and C (common). However, wiring configurations can vary. If your system includes a heat pump, you may encounter additional wires like O/B (reversing valve).
If you are unsure about any wire’s function, consult your HVAC system’s documentation or contact a qualified HVAC professional. Incorrect wiring can damage your system or the thermostat.
Installation Process
Begin by safely removing the old thermostat, mounting the new baseplate, and meticulously connecting the wires according to the detailed wiring guide provided.
Removing the Old Thermostat
Before commencing, ensure the power to your HVAC system is completely switched off at the breaker panel to prevent electrical shock. Carefully remove the cover of your existing thermostat, often by gently prying it off or releasing a clip.
Take a clear photograph of the existing wiring connections – this is crucial for accurate re-connection later. Label each wire with the corresponding terminal designation using the provided wire labels, if available. Disconnect the wires one at a time, avoiding any simultaneous disconnections that could lead to confusion.
Once all wires are disconnected, carefully remove the old thermostat baseplate from the wall. Note the mounting screw locations for easy re-installation of the new Honeywell Home Pro Series baseplate. Dispose of the old thermostat responsibly, following local regulations for electronic waste.
Mounting the Thermostat Base
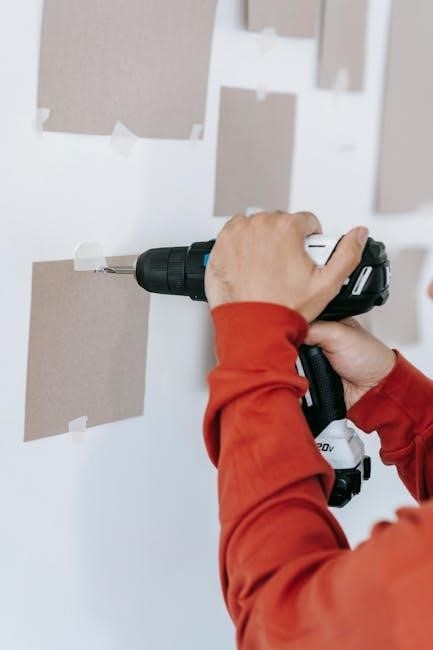
Position the Honeywell Home Pro Series thermostat baseplate on the wall, aligning it with the existing screw holes from the previous thermostat, if possible. If new holes are required, use the provided anchors for secure mounting on drywall or plaster.
Ensure the baseplate is level using a spirit level for accurate temperature readings and a professional appearance. Secure the baseplate to the wall using the provided screws, tightening them firmly but avoiding over-tightening, which could damage the wall or the baseplate.
For installations requiring a J-box adapter, ensure it is securely fastened to the wall before attaching the baseplate. Verify the baseplate is flush against the wall and that all wiring will reach the terminals without strain. A properly mounted base is fundamental for a stable and reliable installation.
Connecting the Wiring – Detailed Guide
Before connecting wires, always power off the HVAC system at the breaker to prevent electrical shock. Carefully identify each wire using the existing thermostat’s labeling or a wiring diagram. Match the wires to the corresponding terminals on the Honeywell Home Pro Series baseplate – typically labeled R, C, W, Y, G, etc.
Securely insert each wire into its designated terminal, ensuring a firm connection. Loose connections can cause system malfunctions. Double-check all wiring connections against the system’s wiring diagram and the thermostat’s compatibility requirements.
For heat pump systems, specific wiring configurations apply; consult the dedicated section for details. Proper wiring is crucial for correct operation and avoiding damage to the HVAC equipment.
Wiring for Heat Pump Systems
Heat pump wiring differs significantly from conventional systems. Typically, you’ll encounter O/B wire for reversing valve control, alongside the standard R, C, Y, and G wires. The O/B wire configuration—whether it energizes for cooling (O) or heating (B)—must be correctly identified during setup within the Honeywell Home app.
Some heat pump systems utilize an auxiliary or emergency heat wire (AUX/E). This wire provides supplemental heat during extremely cold temperatures. Ensure proper connection to the designated terminal. Incorrect wiring can lead to inefficient operation or system failure.
Always refer to the specific heat pump system’s wiring diagram and the Honeywell Home Pro Series manual for accurate terminal assignments. A professional HVAC technician should handle complex heat pump wiring scenarios.
Wiring for Forced Air Systems
Forced air systems, the most common type, generally require connections for R (power), C (common), W (heat), Y (cool), and G (fan). The ‘R’ wire provides 24V power, while ‘C’ completes the circuit, essential for consistent thermostat operation. ‘W’ activates the heating system, ‘Y’ the cooling, and ‘G’ controls the blower fan.
Verify the existing wiring corresponds to these designations before connecting to the Honeywell thermostat base. Incorrect connections can damage the system or thermostat. If your system includes a separate auxiliary heat, connect it to the AUX terminal.
Double-check all connections for tightness and proper insulation. A secure connection is crucial for reliable performance. Consult the system’s wiring diagram and the Honeywell manual for specific guidance.
Wiring for Hydronic Systems
Hydronic systems, utilizing hot water for heating, present unique wiring considerations. Typically, connections involve R (power), C (common), W (heat), and often, a separate wire for the boiler or zone valve. The ‘W’ terminal activates the circulator pump, initiating heat distribution.
Unlike forced air, hydronic systems may not require a ‘G’ (fan) wire, as they don’t rely on a blower. However, some systems utilize a fan control, necessitating a ‘G’ wire connection. Ensure proper identification of the boiler or zone valve wiring before connecting.
Carefully review the system’s wiring diagram and the Honeywell manual for specific instructions. Incorrect wiring can lead to system malfunction or damage. Secure connections and proper insulation are vital for reliable operation.

Thermostat Setup and Configuration
Post-installation, power on the thermostat, connect to the Honeywell Home app, and configure system type settings for optimal performance and personalized control.
Powering On and Initial Setup
Upon completing the physical installation and wiring connections, the Honeywell Home Pro Series thermostat is ready for initial power-up. Ensure the power supply to your HVAC system is active. The thermostat display should illuminate, initiating the startup sequence.
Follow the on-screen prompts to begin the initial setup process. This typically involves selecting your preferred language, date, and time settings. The thermostat will then guide you through a system check, verifying proper wiring and component functionality.
Pay close attention to any error messages displayed during this phase, as they indicate potential wiring issues or system incompatibilities. Correct any identified problems before proceeding. The initial setup also allows for basic system configuration, such as defining the heating and cooling stages. Accurate configuration is crucial for optimal performance and energy efficiency.
Connecting to the Honeywell Home App
To unlock the full potential of your Honeywell Home Pro Series thermostat, connect it to the Honeywell Home app, available on both the App Store and Google Play. Download and install the app on your smartphone or tablet. Create an account or log in if you already have one.
Within the app, select the option to add a new device and follow the guided instructions. The app will search for nearby thermostats in pairing mode. Ensure your thermostat is broadcasting a Bluetooth signal for easy discovery.
Once detected, the app will prompt you to enter your Wi-Fi network credentials. A stable Wi-Fi connection is essential for remote access and advanced features. Successful connection enables remote control, scheduling, and access to hidden PRO installation features, enhancing overall system management.
Configuring System Type and Settings
After connecting to the Honeywell Home app, accurately configure your heating and cooling system type. The app guides you through selecting options like forced air, heat pump, or hydronic systems. Correct system identification is crucial for optimal performance and efficient operation.
Next, customize settings such as temperature units (°F or °C), display preferences, and swing settings. Honeywell utilizes an advanced algorithm fixing deadband at 0°F, surpassing previous thermostat capabilities. Explore options for fan control – auto or on – and configure swing settings to manage temperature fluctuations.
For advanced users, delve into settings related to backup heat droop (specifically on the TH4210U model) to fine-tune heating transitions. Proper configuration ensures comfort and energy savings tailored to your specific home environment.
Advanced Features and Programming
Explore scheduling, geofencing, and smart home integration for personalized comfort and energy efficiency with the Honeywell Home app and thermostat capabilities.
Scheduling and Programmable Options
The Honeywell Home Pro Series thermostats offer robust scheduling capabilities, allowing users to create customized heating and cooling programs tailored to their lifestyles. Programmed schedules can significantly reduce energy consumption by automatically adjusting temperatures based on occupancy and time of day. Users can define different temperature settings for weekdays, weekends, and even specific times within each day.
The thermostats support multiple program periods, enabling granular control over comfort levels. Advanced programming features include temporary holds, vacation modes, and smart recovery, which anticipates temperature changes to ensure optimal comfort when a program resumes. Through the Honeywell Home app, scheduling can be easily managed remotely, providing convenience and flexibility. These programmable options empower users to optimize their home climate while minimizing energy costs, contributing to a more sustainable and cost-effective living environment.
Geofencing and Smart Home Integration
Honeywell Home Pro Series thermostats seamlessly integrate with popular smart home ecosystems, including Amazon Alexa and Google Assistant, enabling voice control and automation. Geofencing utilizes your smartphone’s location to automatically adjust the thermostat when you arrive or depart, maximizing comfort and energy savings. This feature creates a virtual perimeter around your home, triggering temperature changes based on your proximity.
Beyond voice control, integration allows for the creation of custom routines and scenes, linking the thermostat with other smart devices like lighting and security systems. The Honeywell Home app serves as a central hub for managing these integrations, providing a unified control experience. Remote access ensures you can monitor and adjust your home’s temperature from anywhere with an internet connection, enhancing convenience and peace of mind.
Understanding Backup Heat Droop (TH4210U)
The Backup Heat Droop feature, exclusive to the TH4210U model, addresses scenarios where a heat pump struggles to maintain temperature during extremely cold weather. It intelligently allows the auxiliary (backup) heat to engage before the heat pump reaches its minimum operating temperature, preventing uncomfortable temperature swings. Honeywell employs an advanced algorithm, fixing the deadband at 0°F, a significant improvement over previous thermostat designs.
This proactive approach ensures consistent warmth, even when the heat pump’s efficiency diminishes. The droop setting determines how much the temperature must drop below the setpoint before backup heat activates. Proper configuration is crucial; too aggressive a setting can lead to excessive auxiliary heat usage, while too conservative a setting may compromise comfort. Consult the Honeywell Home app for detailed adjustment options and recommendations.
Troubleshooting Common Issues
This section addresses frequent problems like power failures, connectivity disruptions, and inaccurate temperature readings, offering solutions for a smooth Honeywell thermostat experience.
Thermostat Not Powering On
If your Honeywell Home Pro Series thermostat fails to power on, begin with basic checks. First, verify the power supply at the furnace or HVAC system is active; a tripped breaker or disconnected power switch are common culprits. Next, carefully inspect the thermostat wiring, ensuring all connections are secure and correctly placed according to the installation guide.
Confirm the ‘C-wire’ (common wire) is properly connected, as this is crucial for providing continuous power. If a C-wire isn’t present, a C-wire adapter might be necessary. Double-check the thermostat’s fuse (if applicable) and replace it if blown. Also, ensure the thermostat base is firmly mounted and making good contact. If issues persist, consult the Honeywell Home app for diagnostic tools or contact a qualified HVAC professional for assistance.
Connectivity Problems
Experiencing connectivity issues with your Honeywell Home Pro Series thermostat? First, ensure your home Wi-Fi network is functioning correctly and that the thermostat is within range of the router. Verify the Wi-Fi password entered during setup is accurate. Restarting both your router and the thermostat can often resolve temporary glitches.
Within the Honeywell Home app, check for firmware updates for the thermostat, as these often include connectivity improvements. If the thermostat was recently moved or the network configuration changed, re-register the device within the app. Interference from other wireless devices can also cause problems; try relocating the router or thermostat. For persistent issues, consult the app’s troubleshooting section or contact Honeywell support for further assistance.
Incorrect Temperature Readings
If your Honeywell Home Pro Series thermostat displays inaccurate temperature readings, several factors could be at play. Ensure the thermostat isn’t directly exposed to sunlight, drafts, or heat-generating appliances, as these can skew the sensor readings. Verify the thermostat is level, as an uneven installation can affect accuracy.
Within the Honeywell Home app, check the thermostat’s location settings and calibrate the temperature if necessary. The advanced algorithm fixes deadband at 0°F, but external influences can still cause discrepancies. If the problem persists, confirm proper wiring connections, particularly for systems with remote sensors. Consider professional calibration or replacement if the issue remains unresolved, ensuring accurate climate control.

Honeywell Home App – Pro Installation Features
The Honeywell Home app unlocks hidden PRO installation features, enabling remote access, streamlined setup, and convenient software updates for optimal thermostat performance.
Hidden PRO Installation Features
The Honeywell Home app provides installers with exclusive PRO features not readily available to end-users. These functionalities significantly streamline the installation and setup process, enhancing efficiency and accuracy. A key benefit is the ability to remotely configure thermostat settings, eliminating the need for constant on-site adjustments.
Furthermore, the app facilitates advanced diagnostics, allowing professionals to quickly identify and resolve potential issues during installation. This includes detailed system checks and error reporting. The PRO mode also enables customized scheduling options and advanced control over system parameters, ensuring optimal performance tailored to specific HVAC configurations. Utilizing these hidden features, installers can deliver a superior customer experience and ensure a flawless Honeywell Home Pro Series thermostat installation;
Remote Access and Control
Once the Honeywell Home Pro Series thermostat is connected to the Honeywell Home app, users gain comprehensive remote access and control capabilities. This allows for convenient management of home comfort from anywhere with an internet connection, using a smartphone or tablet. Adjust temperature settings, view system status, and receive alerts—all remotely.
The app’s intuitive interface provides real-time data on energy usage, enabling informed decisions to optimize efficiency and reduce costs. Remote access also extends to scheduling adjustments, ensuring a comfortable environment even when away from home. Furthermore, authorized users can grant access to family members or trusted professionals, facilitating collaborative control and maintenance. This level of connectivity enhances convenience and peace of mind for Honeywell Home users.
Software Updates and Maintenance
Maintaining optimal performance of your Honeywell Home Pro Series thermostat relies on regular software updates delivered through the Honeywell Home app. These updates introduce new features, enhance security protocols, and improve overall system stability. The app automatically notifies users when updates are available, streamlining the process.
Periodic maintenance checks, performed via the app, can diagnose potential issues before they escalate. This proactive approach minimizes downtime and ensures consistent operation. The app also provides access to a comprehensive knowledge base and troubleshooting resources. Resideo Technologies, Inc., the manufacturer, continually refines the software based on user feedback and technological advancements. Keeping the thermostat updated guarantees access to the latest innovations and a secure, reliable smart home experience;